Before you begin
Before creating and using a Connector in Clarify, please review the following requirements and prerequisites.
Required setup in Acumatica (obtaining required auth info)
Allow Permissions
Log into your Acumatica account, and allow the permissions for API and Offline Access. This gives Clarify access to the Acumatica Rest APIs and also enables OAuth 2 Token Refresh mechanism. The following will be obtained:
- Base URL (this is the actual URL used to login to the Acumatica account)
- Swagger URL
- Client ID
- Client Secret
- Callback URL
Obtain the Swagger URL
- Go to Integration >> Web Services Endpoint and select Open API 2.0.
Doing so shows the swagger document.
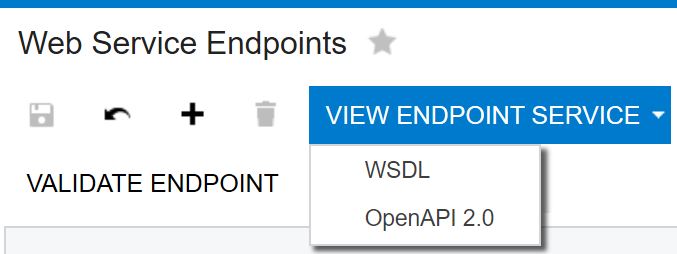
- Copy and retain the swagger URL.
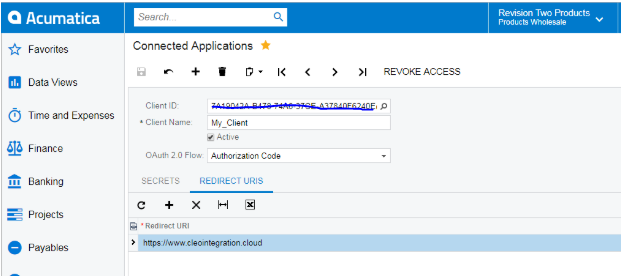
Obtain Client ID and Client Secret (Register a client)
- Go to Integration >>Connected Applications
- Enter Client Name
- Select Authorization Code in the OAuth 2.0 Flow drop-down
- Add Shared Secret (and set an appropriate expiry date for the token)
- Copy and save the value of the secret
- Select the Redirect URI tab and add the Call back URL. (The authorization code will be received on this URL). Use the following: https://www.cleointegration.cloud
- Save. A new client ID is generated. Record both the Client Id and Client Secret for use in Clarify when creating a vault entry.
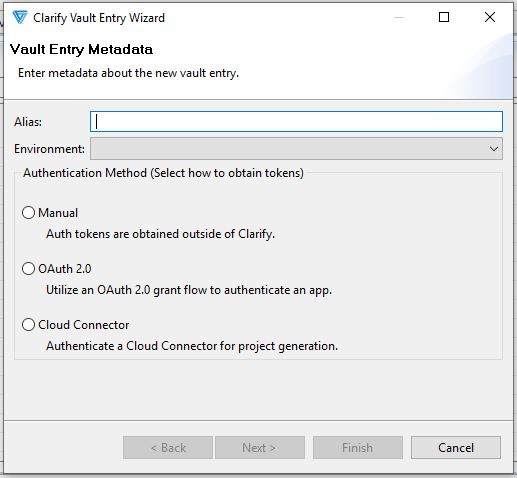
Create a Vault Entry for your API Account Authentication
To create a Connector, you must first store the authorization information in an Authorization Vault, which provides a secure storage location for API keys, tokens, username and passwords, headers, and other info used to authorize calls to external Web Services. In order for a Cloud Connector to work, this vault entry must exist and be configured for the external application you wish to communicate with.
The vault entry can be created from the Admin Console’s Settings | Auth Vault view, or directly from the Cloud Connector wizard (shown below). See Secure Authorization of Web Service Requests using a Clarify Server Vault to learn how to create a vault entry. When doing, so select Cloud Connector as the Authentication Method.
- Base URL
- Swagger URL
- Client ID
- Client Secret
- Callback URL
Current Clarify Studio and Server version requirements
Connector support is available in Cleo Clarify v4.17 and higher.
Specialized Server Licensing Required
The Application Connector requires a specialized server license. See your Customer Account Manager. If you need assistance applying your license, see the Licensing section of the Clarify v4 User Guide.
Technical Assumption
Effective use of the Connector assumes the following:
- You are familiar with the development and organization of your external application account.
- You know the particulars of your data and the external processes to manage it.
- You have a general understanding of how to create and share resources, and launch integration projects in Clarify.